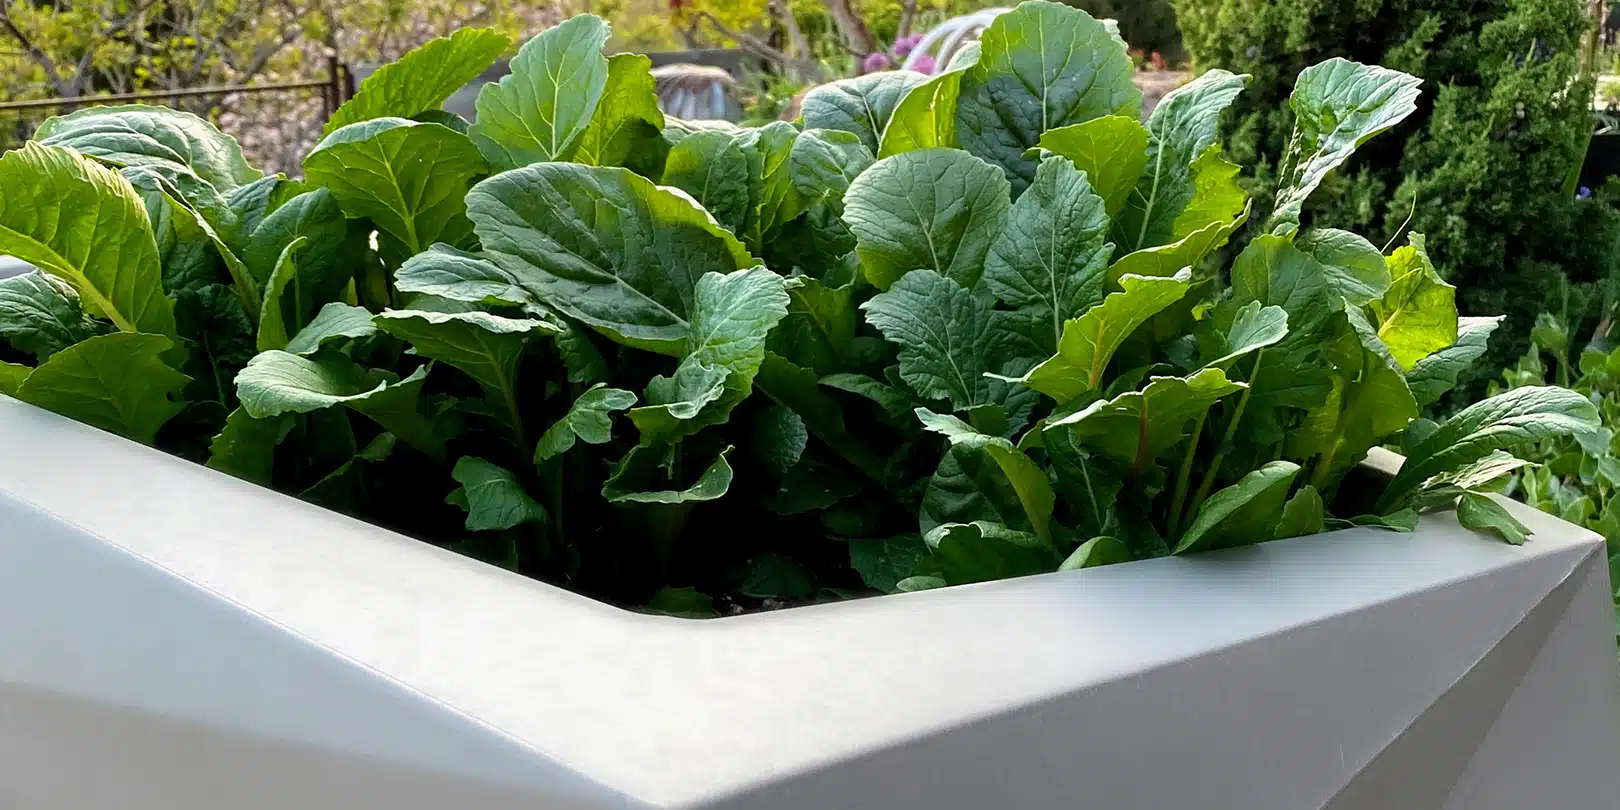
After a very long, cold, and fussy Spring, we finally have delicious mixed, cut-and-come-again greens whenever we want them. Quite some time has passed since I planned out my edibles container. So long, in fact, that the first large harvest tasted like, well, a triumph. There is something so satisfying about finally eating something you have grown from seed. We are especially fond of mustard-type greens, and these were particularly yummy.
So, how’s the Crescent Origami planter working out? Swell! It’s not only pretty to look at but easy to access, maneuver, and tend. While decent growing weather took forever to get here, I could rotate the planter every couple of days to ensure the seedlings grew solid and straight. Interestingly, only two-thirds of the seeds germinated and grew. As you can see, one entire side of the planter had no sprouts at all. There were signs of disturbed soil on the bare-naked side, so we believe our feathered friends made a meal of the sown seeds before they ever had a chance to reach for the light. I’ve since planted a second and third crop, and we will see what happens!
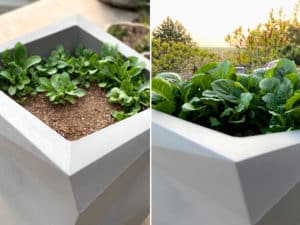
Early Plants to Salad Ready in Origami 26” Planter
How did you cook those greens, you ask? MMMMM…good and so good for you.
Ingredients
- A large bunch of greens from your garden: Kale, chard, mustard greens, or any combination of them.
- 1-2 strips of bacon, or ½ tablespoon of sesame oil and ½ tablespoon of grapeseed oil
- 1/4 of a white onion, finely chopped
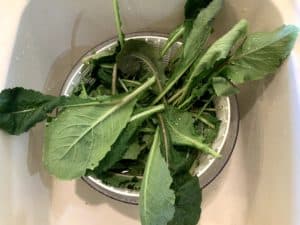
Washing harvested greens
How to cook
- Place bacon strips in large frying pan and sauté at medium to medium high until slightly crispy and you have rendered the bacon of its cooking fat. If you wish, omit the bacon, and use a vegan cooking oil.
- Remove the pieces of bacon if you used them. Proceed by sautéing the onions in the bacon grease or the oil you chose.
- We had 4 large fluffy, handfuls of just harvested, washed mixed greens with the water still clinging to the leaves. We tossed those in the pan with sautéed onion, and put a lid on the pan. Stir a couple of times to distribute the greens until they are perfectly, evenly wilted.
- Serve with a splash of your favorite vinegar for a breakfast treat, top with a poached egg. For lunch, repeat. For dinner, eat this as a side dish, or stir into warm pasta for an upgraded main dish.
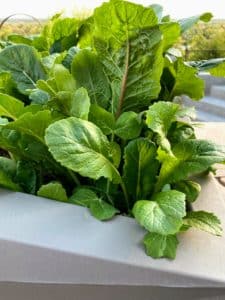
Healthy greens ready to go
Pretty soon, I will tuck a Sun Sugar indeterminate (read: rangy and tall) tomato plant in the middle of the planter, so when the greens and peas have expired, the next edible crop is on its way. Tuck a few orange Cosmos, Marigolds, or Calendula plants into the planter, which will echo the orange-gold color of the tomatoes for a snazzy combo. They will keep the planter looking good as the summer heats up. Speaking of the hot weather, it will be nice, too, to roll the whole shebang to a more protected spot when the summer sun becomes unbearable, and the plant needs a respite from the 110-degree days. I’ll be back soon to share my second act: potting up for summer!